Round Table Pizza Dough Recipe
Good pizza starts with good dough. Many of us try making pizza at home but end up with crust that tears or tastes wrong.
A few years back, my pizza never came out right. The dough stuck to my hands or came out too hard.
Then my aunt came to visit for a week. She used to work at Round Table Pizza and knew exactly how they made their dough. She showed me every step in my kitchen. We mixed, kneaded, and baked together.
By the end of that week, my pizza changed completely. Now my crust comes out soft inside with crisp edges every time.
Today, I want to share this Round Table Pizza Dough Recipe with you so your homemade pizza can turn out just as good.

Does Round Table Sell Pizza Dough?
No, Round Table Pizza does not sell its pizza dough directly to customers. You cannot buy their raw dough from their locations or online store. They keep their dough-making process in-house for quality control.
This means the only way to get that same taste at home is to make your own version using a copycat recipe like this one.
Is Round Table Dough Vegan?
When people ask me, “Is Round Table dough vegan?” I always have to clarify that not all of Round Table’s dough is vegan. However, the simple dough recipe I’m sharing with you today is completely vegan.
You don’t have to worry about hidden dairy or additives – you’re working with clean, classic ingredients like flour, water, yeast, oil, and salt.
If you’ve been looking for a reliable vegan dough option, you’ll love how easy this one is to make.
Round Table Pizza Dough Ingredients
You only need a few simple items to start. Most are already in your kitchen. Feel free to use these substitutions if needed.
- Bread Flour (4 cups) : Bread flour gives strong structure. Its protein level helps the dough stretch without tearing. This leads to a soft inside and crisp outer edge. You can use all-purpose flour, but the crust may come out slightly less chewy. Bread flour works best for pizzeria-style texture.
- Warm Water (1 1/3 cups) : Warm water helps activate the yeast and brings the dough together into a smooth texture. If the water is too hot, it can stop the yeast from working, and if it’s too cold, it slows the rise. Try to keep the water around 100°F to 110°F for best results.
- Salt (2 teaspoons) : Salt boosts flavor and helps strengthen the dough. It keeps the crust from tasting flat. You can use sea salt, kosher salt, or even table salt. Just don’t skip it, or your pizza will taste bland.
- Instant Yeast (1 teaspoon) : Instant yeast mixes easily and doesn’t need extra steps. It blends right into the flour and water without soaking. You can use active dry yeast instead, but you’ll need to dissolve it in warm water first before mixing it with the flour.
- Olive Oil (2 teaspoons) : Olive oil adds tenderness and makes the dough easy to handle. It keeps the crust light and helps prevent cracking at the edges. Vegetable oil or canola oil can work too, but olive oil gives a richer flavor.
Essential Kitchen Equipment
- Large Mixing Bowl – holds dough and allows space for mixing
- Wooden Spoon or Fork – easy blending tool
- Clean Counter Surface – used for kneading
- Kitchen Towel or Plastic Wrap – covers dough during rest
- Bench Scraper – optional but helpful for handling dough
- Oiled Bowl – holds dough during rise
- Oven – heats crust for final bake
- Pizza Stone or Steel – helps brown the bottom
- Measuring Cups and Spoons – gives accurate ingredient amounts
How to Make Round Table Pizza Dough at Home
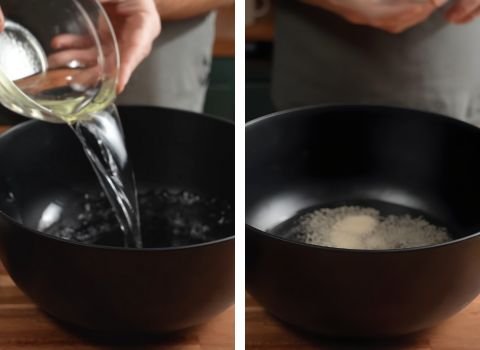
Step 1 | Mix the Warm Water and Yeast
Pour warm water into a large bowl. Add the instant yeast and give it a quick stir. Instant yeast does not need extra waiting time, so there is no delay. The water blends it fast, and the bowl is ready for the next step.
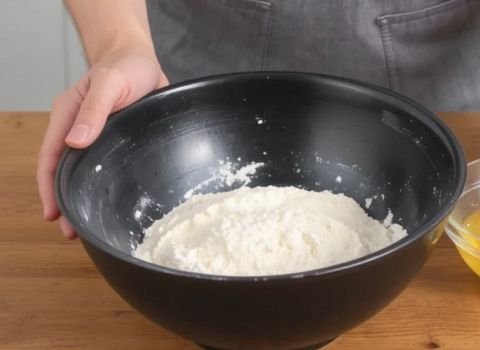
Step 2 | Add Flour and Salt
Scoop the flour into the bowl. Add the salt on top of the flour so it does not touch the yeast too early. Salt slows yeast growth when placed straight on it. When it rests on the flour, the dough rises evenly and builds good strength.
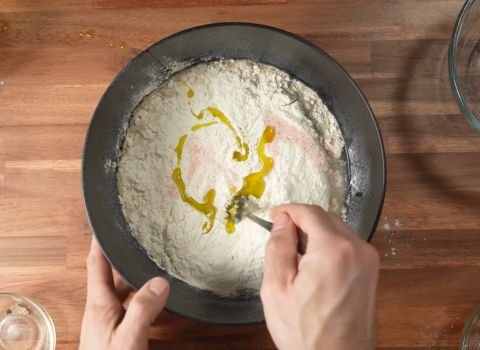
Step 3 | Add Olive Oil
Pour in the olive oil. The oil loosens the dough and helps it blend. It also makes the crust soft and smooth later on.
Step 4 | Mix Until Shaggy
Use a spoon, fork, or clean hands. Mix everything together until you get a rough, sticky dough. It does not need to look smooth yet. The dough gets its shape during kneading, not during this step. At this stage, it only needs to be blended well.

Step 5 | Rest the Dough for 10 Minutes
Let the dough sit for ten minutes. This break allows the flour to soak up the water. After this short rest, kneading becomes easier and the dough becomes less sticky.
Step 6 | Knead the Dough
Place the dough on the counter. Press it with the heel of your hand, fold it over, and turn it slightly. Repeat this pattern. In about five to seven minutes, the dough becomes smooth, stretchy, and elastic. It should spring back when touched.

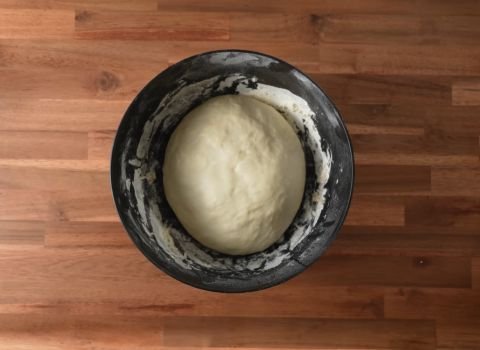
Step 7 | First Rise
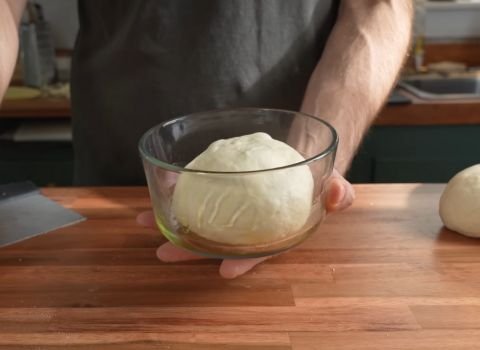
Lightly coat a bowl with oil. Place the dough ball inside and cover it with a towel, lid, or plastic wrap. Let it rise at room temperature for 90 minutes to 2 hours. The dough should double in size and feel airy and light.
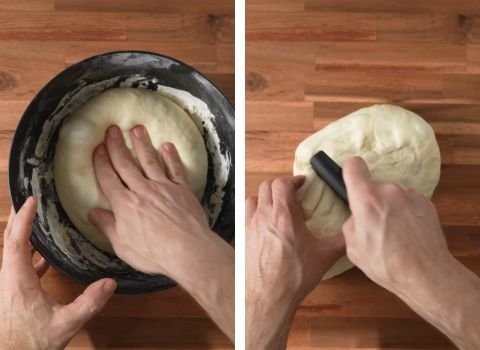
Step 8 | Punch Down and Divide
Gently press your hand into the risen dough to release the air. This prepares it for shaping. Divide the dough into two even pieces. Each piece will make one pizza.
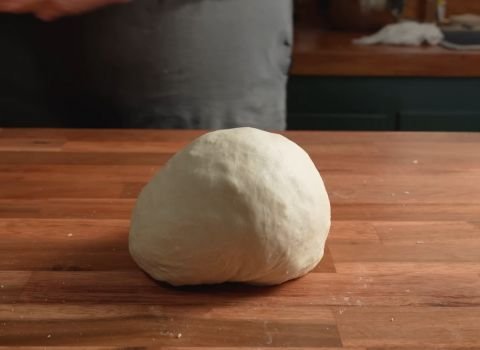
Step 9 | Shape into Balls
Tuck the edges of each dough piece under to form smooth, tight dough balls. A tight top helps the dough stretch evenly later on. Place the dough balls on a tray or in a bowl.
Step 10 | Rest Again
Let the dough rest for one hour. This helps the gluten relax and makes stretching easier. You can place the dough in the fridge to wait longer. It can stay there until pizza time. Take it out 30 minutes before shaping so it can warm up.
Step 11 | Stretch the Dough
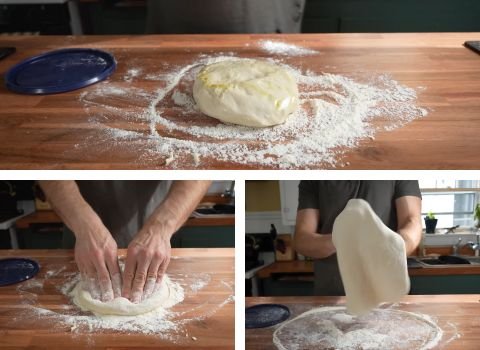
Dust the counter with flour. Press the dough outward from the center using your fingertips. Lift it up and let gravity help pull it into shape. Stretch it to about 14 inches for a classic crust.
Step 12 | Ready for Toppings
Add your sauce, cheese, and toppings. This dough stays strong and can hold light or heavy toppings.

Step 13 | Bake
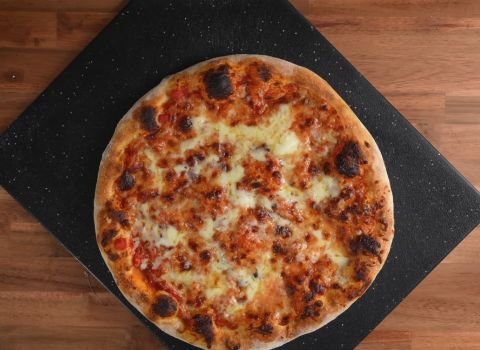
Heat the oven to 500°F. Warm a pizza stone or steel inside. Place your shaped dough on it and bake for 7 to 10 minutes. The crust should turn golden and crisp on the bottom while staying soft inside.
Chef’s Special Notes
- Use Room Temperature Ingredients: Cold flour or cold oil can slow down the yeast. Let everything sit out for about 20 minutes before you start mixing. This helps the dough rise faster and more evenly.
- Check Your Yeast: Old yeast doesn’t work well. Check the date on the package. You can also test it by mixing a pinch with warm water and a little sugar. It should bubble in five minutes.
- Keep Your Hands Lightly Floured: Sticky dough is normal, but too much sticking makes kneading hard. Dust your hands with a little flour as you work. Don’t add too much, or the dough becomes dry.
- Preheat Your Oven Fully: A hot oven creates the crispy bottom and soft top that pizzerias are known for. Let your oven heat for at least 30 minutes before baking. This ensures the stone or steel gets hot enough.
4 Ways To Use Homemade Pizza Dough
This dough works for more than just classic round pizzas. The same recipe creates different meals based on how you shape and top it.
1. Sheet Pan Pizza – Press the dough into a sheet pan for thick, square slices that feed a crowd.
2. Breadsticks – Cut the dough into smaller pieces and shape them into breadsticks. Brush them with garlic butter before baking.
3. Homemade Crackers – Roll it thin and cut it into strips. Bake until crispy and sprinkle with salt and herbs.
4. Calzones – Fold the dough over cheese and toppings, then seal the edges for a stuffed pizza pocket.
Storage and Freeze Options
1. To Store: Fresh dough can stay in the fridge for two days. Keep it in a lightly oiled bag or container with a tight seal. The chill slows the rise but keeps the dough soft and ready to shape.
Let it sit on the counter about 30 minutes before baking so it warms up and stretches well.
2. To Freeze: Dough freezes well for up to three months. Wrap each dough ball in plastic wrap and place it in a freezer bag.
Thaw it in the fridge overnight before use. Once soft, let it warm on the counter before shaping. This slow thaw keeps the texture smooth and steady during baking.
Round Table Pizza Dough Recipe FAQs
1. Why is my dough not rising?
A few things can stop dough from rising. The yeast might be old and no longer active. Always check the expiration date.
The water could have been too hot and killed the yeast; warm water is best. Or, the spot where the dough was placed to rise could be too cold.
Yeast needs a warm environment to become active and produce the gas that makes the dough puff up.
2. Can I make the whole recipe by hand?
You absolutely can make this recipe by hand. You do not need a mixer. Using a bowl and a wooden spoon for mixing works perfectly.
Then, kneading on a counter for a few minutes is all it takes. Many bakers prefer using their hands to feel the dough’s texture as it changes.
3. My dough is too sticky. What should I do?
It is normal for dough to be a little sticky at first. If it is too sticky to handle, lightly flour your hands and the counter. Avoid adding too much extra flour, as this can make the dough tough.
A bench scraper is a great tool to help handle sticky dough without adding more flour.
4. Can I bake this dough on a regular baking sheet?
Yes, you can bake pizza on a regular baking sheet. The crust won’t get as crispy on the bottom as it would on a pizza stone or steel, but it still tastes great.
Preheat the baking sheet in the oven for a few minutes before adding the dough. This helps the bottom cook faster and get a little crispier.
You can also flip the baking sheet upside down and use the flat bottom as a baking surface. Brush the sheet lightly with oil to prevent sticking.
5. Why does the dough need warm water?
Warm water helps the yeast wake up and start working. Water that is too cold slows the rise, and water that is too hot stops it. Warm water keeps the dough steady and helps it rise with a soft, airy feel.
6. Can this dough hold many toppings?
Yes, this dough holds heavy toppings well because bread flour gives it strong structure. The crust stays firm enough to carry cheese, meats, and vegetables without getting soggy. Stretching it evenly helps keep the crust balanced.
7. Why is the dough sticky after mixing?
Sticky dough is common early on. The flour needs time to soak in water. After a short rest and a few minutes of kneading, it becomes smooth and easier to handle.
A small sprinkle of flour on your hands can help control sticking without drying the dough out.

Round Table Pizza Dough Recipe
Make the best Round Table Pizza Dough Recipe at home in just 3 hours. Simple ingredients, easy steps, and perfect crust every time with this soft and crispy dough.
Ingredients
- Bread Flour – 4 cups
- Warm Water – 1 1/3 cups (100°F–110°F)
- Salt – 2 teaspoons
- Instant Yeast – 1 teaspoon
- Olive Oil – 2 teaspoons
Instructions
- Pour warm water into a large bowl. Add the instant yeast and give it a quick stir. Instant yeast does not need extra waiting time, so there is no delay. The water blends it fast, and the bowl is ready for the next step.
- Scoop the flour into the bowl. Add the salt on top of the flour so it does not touch the yeast too early. Salt slows yeast growth when placed straight on it. When it rests on the flour, the dough rises evenly and builds good strength.
- Pour in the olive oil. The oil loosens the dough and helps it blend. It also makes the crust soft and smooth later on.
- Use a spoon, fork, or clean hands. Mix everything together until you get a rough, sticky dough. It does not need to look smooth yet. The dough gets its shape during kneading, not during this step. At this stage, it only needs to be blended well.
- Let the dough sit for ten minutes. This break allows the flour to soak up the water. After this short rest, kneading becomes easier and the dough becomes less sticky.
- Place the dough on the counter. Press it with the heel of your hand, fold it over, and turn it slightly. Repeat this pattern. In about five to seven minutes, the dough becomes smooth, stretchy, and elastic. It should spring back when touched.
- Lightly coat a bowl with oil. Place the dough ball inside and cover it with a towel, lid, or plastic wrap. Let it rise at room temperature for 90 minutes to 2 hours. The dough should double in size and feel airy and light.
- Gently press your hand into the risen dough to release the air. This prepares it for shaping. Divide the dough into two even pieces. Each piece will make one pizza.
- Tuck the edges of each dough piece under to form smooth, tight dough balls. A tight top helps the dough stretch evenly later on. Place the dough balls on a tray or in a bowl.
- Let the dough rest for one hour. This helps the gluten relax and makes stretching easier. You can place the dough in the fridge to wait longer. It can stay there until pizza time. Take it out 30 minutes before shaping so it can warm up.
- Dust the counter with flour. Press the dough outward from the center using your fingertips. Lift it up and let gravity help pull it into shape. Stretch it to about 14 inches for a classic crust.
- Add your sauce, cheese, and toppings. This dough stays strong and can hold light or heavy toppings.
- Heat the oven to 500°F. Warm a pizza stone or steel inside. Place your shaped dough on it and bake for 7 to 10 minutes. The crust should turn golden and crisp on the bottom while staying soft inside.
Nutrition Information:
Serving Size: 1Amount Per Serving: Calories: 155Total Fat: 2.5gSaturated Fat: 0.4gSodium: 235mgCarbohydrates: 27gFiber: 1gProtein: 5g
This Round Table Pizza Dough Recipe offers a simple, steady process resulting in a crust with excellent texture and flavor. The steps are easy to follow, and you can adjust the dough to suit your own style.
Try this homemade version in your kitchen and share how your pizza turns out. It is a great way to develop new skills and create your own pizza style over time.