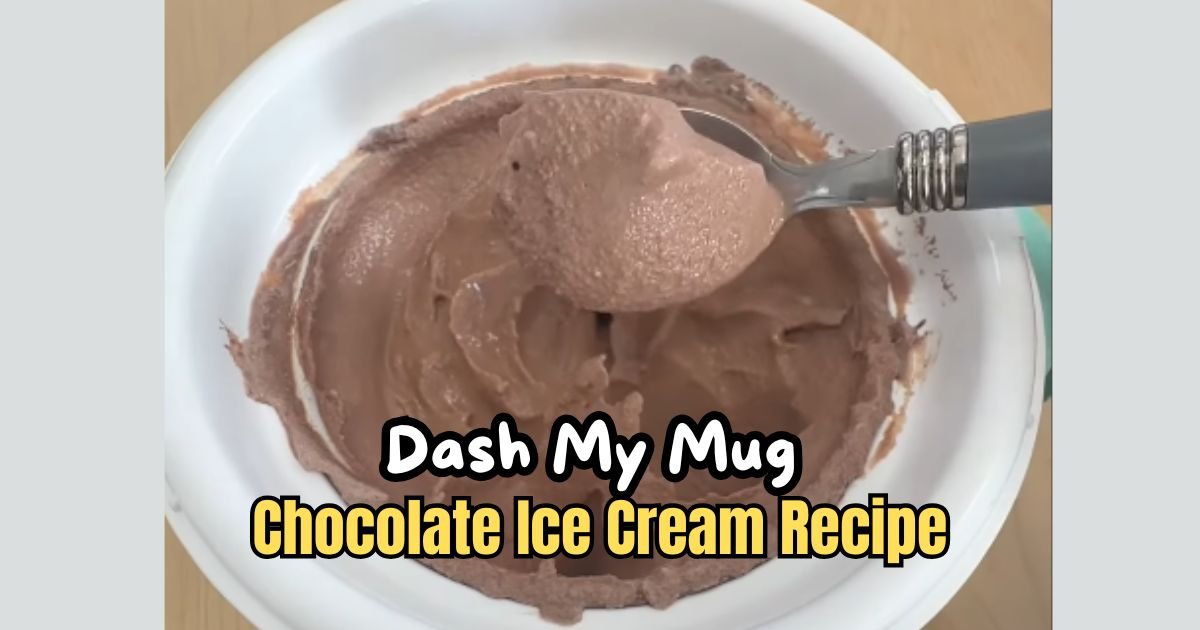
Dash My Mug Chocolate Ice Cream Recipe
Dash My Mug Chocolate Ice Cream Recipe changed my dessert game forever. Last summer, my kids kept asking for ice cream every single day.
Going to the store got old fast, and buying ice cream was getting expensive. That’s when I found my Dash My Mug ice cream maker sitting in the back of my kitchen cabinet. I had almost forgotten about this little machine!
I decided to try making chocolate ice cream right at home. The whole process took just 15 minutes from start to finish. My kids watched with big eyes as the machine churned our simple ingredients into creamy, delicious ice cream.
They couldn’t believe we made real ice cream in our own kitchen. Now, making homemade ice cream has become our favorite weekend activity.
The best part? You can make just one serving at a time, so there’s no waste and everyone gets exactly what they want.
What Does Dash My Mug Chocolate Ice Cream Taste Like
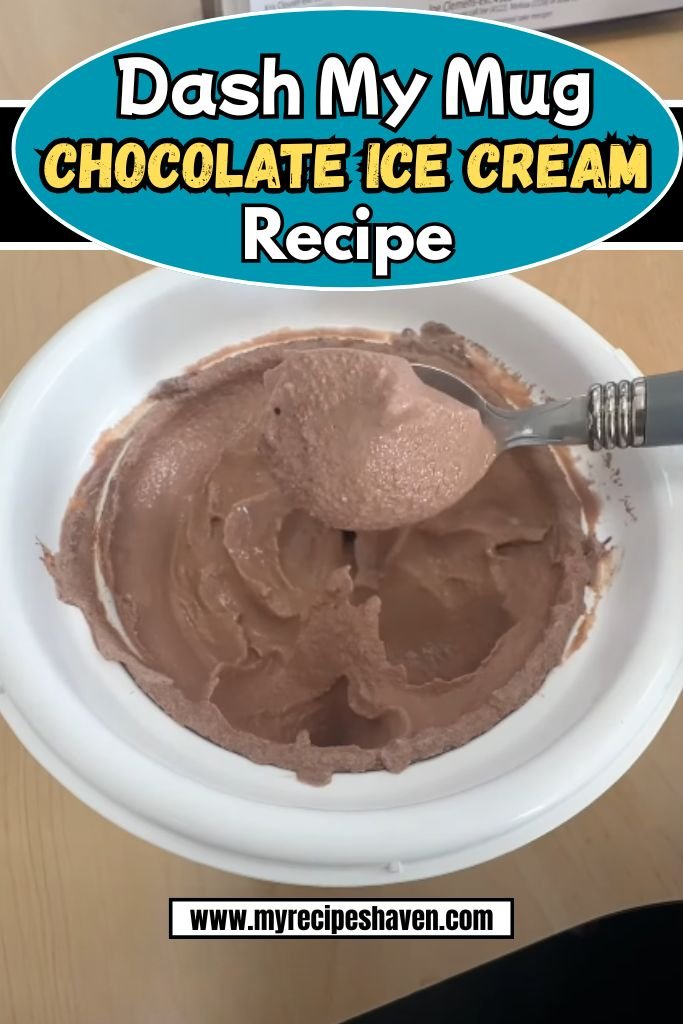
This Dash My Mug Chocolate Ice Cream tastes like pure chocolate heaven in a mug. When you take your first spoonful, you’ll get hit with rich, creamy chocolate that melts on your tongue.
It’s not too sweet like store-bought ice cream can be sometimes. Instead, it has a perfect balance of chocolate flavor that makes you want another bite right away.
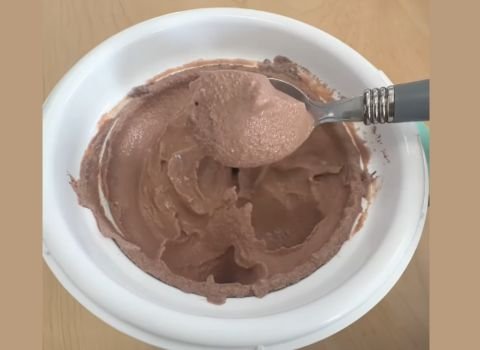
The texture is what really surprised me the first time I made it. It comes out smooth and creamy, just like ice cream from an ice cream shop. You won’t find any ice crystals or weird chunks.
The Dash machine churns it perfectly every time. The chocolate flavor is deep and satisfying, not artificial tasting at all. My whole family agrees it tastes way better than most ice cream we buy from the store. Plus, you can control how sweet or chocolatey you want it to be.
Key Ingredients in Dash My Mug Chocolate Ice Cream
Here’s what you need to make this yummy ice cream. I’ll explain each ingredient and suggest substitutes if you don’t have them.
- Milk (1/2 cup): I use whole milk for a creamy texture. It gives the ice cream a smooth base. If you don’t have whole milk, 2% milk works fine, but it might be a little less rich. Plant-based milk like almond or oat milk can work too, but the flavor might change slightly.
- Sugar (1/4 cup): Sugar sweetens the ice cream and helps it stay soft. I use regular white sugar. You can swap it with a sugar substitute like monk fruit sweetener if you want a lower-sugar option. Just check the package for the right amount.
- Cocoa Powder (2 tablespoons): This gives the deep chocolate flavor. I use unsweetened cocoa powder. Dutch-processed cocoa works too for a smoother taste. If you’re out of cocoa, you can melt 2 ounces of dark chocolate, but reduce the sugar a bit.
- Heavy Cream (1/2 cup): Heavy cream makes the ice cream rich and thick. Whipping cream works the same. If you want a lighter version, half-and-half can substitute, but the ice cream won’t be as creamy.
- Vanilla Extract (1/2 teaspoon): This adds a warm, sweet note that makes the chocolate pop. Pure vanilla extract is best, but imitation works in a pinch. You can skip it if you don’t have any, but it adds a nice touch.
- Salt (a pinch): A tiny bit of salt balances the sweetness. Regular table salt is fine. If you don’t have it, you can leave it out, but it does make the flavor better.
Required Kitchen Tools
Here’s what you need to make this ice cream. These are simple tools you probably already have:
- Dash My Mug Ice Cream Maker
- Small mixing bowl or large liquid measuring cup
- Whisk
- Measuring cups and spoons
- Freezer (to freeze the mug)
- Spoon for mixing and eating
- Optional: small spatula for scraping the bowl
How To Make Dash My Mug Chocolate Ice Cream
Making this ice cream is so easy! Follow these steps, and you’ll have a tasty treat in no time. I’ll guide you like I’m right there with you.
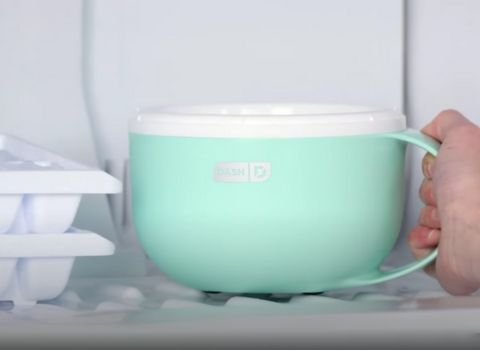
Step 1 | Freeze the Mug
Put the Dash My Mug bowl in your freezer for at least 24 hours. Keep it upright. Your freezer should be at 0°F or colder. I pop mine in the night before so it’s ready.
Step 2 | Mix the Base
Grab a small bowl or a large liquid measuring cup. Pour in 1/2 cup of milk and 1/4 cup of sugar. Whisk them together until the sugar dissolves completely. It takes about a minute. Then, add 2 tablespoons of cocoa powder. Keep whisking until the mix is smooth with no lumps. This might take a couple of minutes because cocoa can be stubborn.
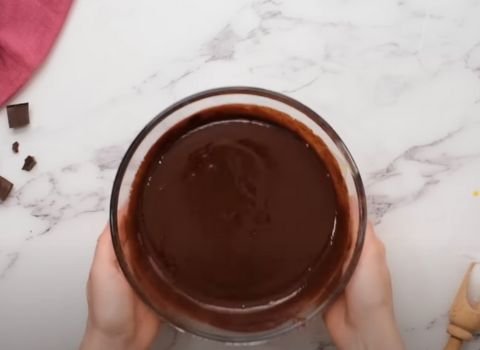
Step 3 | Add the Rest
Pour in 1/2 cup of heavy cream, 1/2 teaspoon of vanilla extract, and a pinch of salt. Stir gently until everything is mixed well. You’ll have just under a cup of liquid. It should look like a creamy chocolate drink.
Step 4 | Set Up the Machine
Take the mug out of the freezer and place it on a flat surface. Attach the motor to the lid until it clicks. Pop the paddle into the motor’s slot. Lower the lid with the motor and paddle onto the mug. Line up the pins on the lid with the notches on the mug’s base. Turn the lid clockwise to lock it.
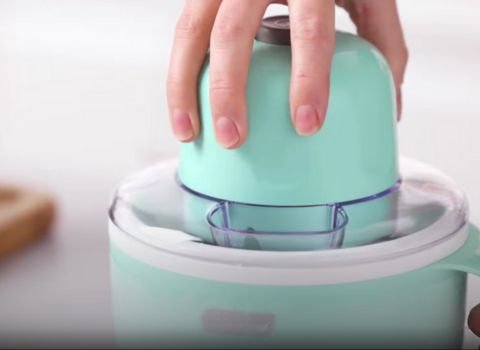
Step 5 | Start Churning
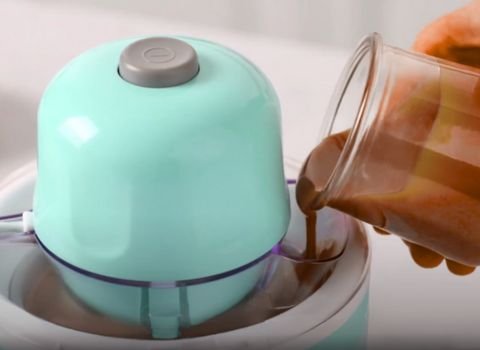
Plug in the ice cream maker and flip the power switch. The paddle will start spinning. Slowly pour your chocolate mixture through the pouring chute while the machine is running. This helps it freeze evenly.
Step 6 | Churn the Ice Cream
Let the machine run for 20-30 minutes. Check it now and then to see if the ice cream is thick and creamy, like soft-serve. If you want to add mix-ins like chocolate chips or cookie bits, drop them through the chute in the last 5 minutes of churning.
Step 7 | Finish Up
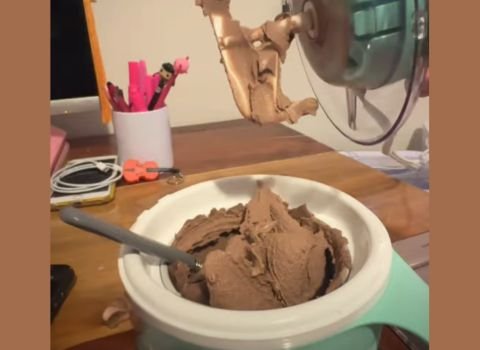
When the ice cream looks ready, turn off the machine. Twist the lid counterclockwise to unlock it. Lift the lid, and the paddle will stay in the ice cream. Pull out the paddle, and your ice cream is ready to eat right from the mug!
Chef’s Notes + Tips
Here are some extra tips to make your ice cream perfect. These are things I learned while making it:
- Chill your ingredients before mixing to help the ice cream freeze faster.
- Don’t overfill the mug; stick to the recipe amounts to avoid spills.
- If the cocoa powder clumps, sift it first for a smoother mix.
- Clean the mug right after eating to keep it ready for next time.
- Try small chocolate chunks instead of chips for a fun texture.
- If the ice cream is too soft, freeze it for 1-2 hours for a firmer scoop.
Make Ahead & Storage
You can prep the liquid base a day ahead. Mix it, cover it, and keep it in the fridge. When you’re ready, just pour it into the frozen mug and churn.
The ice cream is best eaten fresh, but you can store it in the mug in the freezer for up to a week. Cover it tightly with plastic wrap to avoid freezer burn.
If it gets too hard, let it sit at room temperature for 5-10 minutes before scooping.
If you see ice crystals or a weird smell, the ice cream might be bad. Toss it if it tastes off or looks strange.
How To Serve Dash My Mug Chocolate Ice Cream
This ice cream is perfect straight from the mug for a quick treat. You can enjoy it soft-serve style right after churning. For a firmer texture, pop it in the freezer for a couple of hours.
Serve it in a bowl with toppings like whipped cream, sprinkles, or crushed cookies. You can also drizzle chocolate syrup for extra decadence.
It’s great for a solo dessert or to share with a friend. Try it with a warm brownie for a fun combo. Kids and adults both love it!
Dash My Mug Chocolate Ice Cream Recipe FAQs
1. Can I use low-fat milk instead of whole milk?
Yes, you can use low-fat milk like 1% or 2%. The ice cream will still taste good, but it won’t be as creamy. Whole milk gives a richer texture because of its fat content.
If you use low-fat milk, you might notice the ice cream is a bit icier. Stick to the same amount, 1/2 cup, and mix it well with the other ingredients.
2. What if I don’t have a Dash My Mug Ice Cream Maker?
If you don’t have the Dash My Mug, you can try a different small ice cream maker, but check its instructions. You can also make no-churn ice cream.
Mix the ingredients, pour them into a freezer-safe container, and freeze for 4-6 hours. Stir every hour to keep it smooth. It won’t be exactly the same, but it’s still yummy.
3. Can I add other flavors to this recipe?
Absolutely! You can mix in flavors like a teaspoon of peppermint extract for mint chocolate ice cream. Or try stirring in some instant coffee for a mocha vibe.
Add these when you mix in the vanilla extract. For mix-ins, toss in nuts or fruit pieces during the last 5 minutes of churning.
4. How do I know when the ice cream is done churning?
The ice cream is ready when it looks thick and creamy, like soft-serve. This usually takes 20-30 minutes. If it’s still too liquidy, let it churn longer.
Check every few minutes. If the paddle slows down a lot, it’s probably done. Turn off the machine and taste to be sure.
5. Can I double the recipe for a bigger batch?
The Dash My Mug is small, so doubling might not fit. If you have the Dash My Pint machine, you can double the ingredients and churn for 20-30 minutes.
For the My Mug, stick to the recipe amounts to avoid overflowing. Make two batches if you need more ice cream.
6. What if my ice cream is too hard after freezing?
If it’s rock hard, let it sit at room temperature for 5-10 minutes before scooping. This softens it just enough. Don’t microwave it, as it can melt unevenly. If it’s still too hard, your freezer might be too cold. Set it to 0°F for best results next time.
7. How do I clean the Dash My Mug after using it?
Wash the mug, paddle, and lid with warm soapy water right after eating. Don’t put them in the dishwasher, as it can damage the parts. Dry everything well before storing. If there’s stuck-on ice cream, soak the mug for a few minutes first. Keep the motor dry.
Dash My Mug Chocolate Ice Cream Recipe
Make rich Dash My Mug Chocolate Ice Cream in just 30 minutes! Easy, single-serve homemade chocolate ice cream with simple ingredients.
Ingredients
- Whole Milk – 1/2 cup
- Granulated Sugar – 1/4 cup
- Unsweetened Cocoa Powder – 2 tablespoons
- Heavy Cream – 1/2 cup
- Vanilla Extract – 1/2 teaspoon
- Salt – A pinch
Instructions
Step 1 | Freeze the Mug
Put the Dash My Mug bowl in your freezer for at least 24 hours. Keep it upright. Your freezer should be at 0°F or colder. I pop mine in the night before so it’s ready.
Step 2 | Mix the Base
Grab a small bowl or a large liquid measuring cup. Pour in 1/2 cup of milk and 1/4 cup of sugar. Whisk them together until the sugar dissolves completely. It takes about a minute. Then, add 2 tablespoons of cocoa powder. Keep whisking until the mix is smooth with no lumps. This might take a couple of minutes because cocoa can be stubborn.
Step 3 | Add the Rest
Pour in 1/2 cup of heavy cream, 1/2 teaspoon of vanilla extract, and a pinch of salt. Stir gently until everything is mixed well. You’ll have just under a cup of liquid. It should look like a creamy chocolate drink.
Step 4 | Set Up the Machine
Take the mug out of the freezer and place it on a flat surface. Attach the motor to the lid until it clicks. Pop the paddle into the motor’s slot. Lower the lid with the motor and paddle onto the mug. Line up the pins on the lid with the notches on the mug’s base. Turn the lid clockwise to lock it.
Step 5 | Start Churning
Plug in the ice cream maker and flip the power switch. The paddle will start spinning. Slowly pour your chocolate mixture through the pouring chute while the machine is running. This helps it freeze evenly.
Step 6 | Churn the Ice Cream
Let the machine run for 20-30 minutes. Check it now and then to see if the ice cream is thick and creamy, like soft-serve. If you want to add mix-ins like chocolate chips or cookie bits, drop them through the chute in the last 5 minutes of churning.
Step 7 | Finish Up
When the ice cream looks ready, turn off the machine. Twist the lid counterclockwise to unlock it. Lift the lid, and the paddle will stay in the ice cream. Pull out the paddle, and your ice cream is ready to eat right from the mug!
Nutrition Information:
Serving Size: 1Amount Per Serving: Calories: 360Total Fat: 28gSaturated Fat: 17gCholesterol: 95mgSodium: 90mgCarbohydrates: 28gSugar: 25gProtein: 4g
Final Words
This Dash My Mug Chocolate Ice Cream Recipe is a game-changer for quick, delicious desserts. It’s so easy to make, and the chocolatey flavor is a crowd-pleaser.
I love how fast I can whip it up at home. Try it yourself—you’ll be amazed at how simple and tasty it is. Grab your Dash My Mug and enjoy a sweet treat today!